


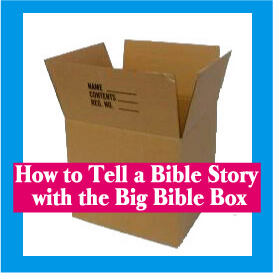
The Scripture Lady loves coming up with fun ways to tell Bible stories! Here is one called “The Big Bible Box.”
Telling a Bible story is often the highlight of any Sunday School class or devotion time. Sometimes children drift when a story is only spoken—using a creative, hands-on approach keeps little ones engaged and helps them remember Scripture. This Bible storytelling idea is written for Christian teachers and parents of 4–7-year-olds and shows a simple, repeatable way to bring a bible story to life.
Use this idea to help children remember scripture, engage their imagination, and invite hands-on participation. In the short guide below you’ll find what materials to gather, step-by-step prep, a simple telling plan, and follow-up questions and activities that fit the attention span of young children. Try this at your next class or at home during devotion time — it’s an easy, fun way to share a bible story.
Bible Storytelling Idea: The Big Bible Box — I first noticed this approach when skimming an old puppet book that used a shoebox as a little stage for stick puppets. That simple, visual staging sparked a bigger idea: what if I used a larger box as a storytelling stage so each side showed a scene? It’s an easy, memorable way to tell a bible story to young children.
Materials and basic setup I used: a 20-inch square box (or a large moving box as an alternative), sheets of colored poster board or construction paper, laminating or clear contact paper, strong tape, scissors, and a printer for images. I covered each side with a different colored poster board and sealed the edges.
At this point, I suggest doing one of two things:
- Laminate all sides of the poster board on the box. Any scenes you attach can easily be taped on an then easily taken off. Without lamination, you may end of tearing the poster board.
- Create clear plastic “pockets” on each side of the box. These can serve as inserts for your pictures. You can use your box over and over again for many different stories. Fabric stores sell clear plastic vinyl in different weights. I would suggest using a light weight vinyl.
Now prepare your six large scene pictures to attach or insert—one for each side. This gives you a compact, rotating stage that works well for a short, six-scene story designed for 4–7-year-old children.
If you are having trouble finding pictures to illustrate your story, I hight suggest you go on Canva.com and use their AI capability. They have a free level and you will come away with some wonderful pictures that are copyright free.
I had to tell the story of Shadrach, Meshach and Abednego and found just the pictures I needed. Since my box has six sides, I narrowed my story down to six pictures that portrayed the scenes of the story. I enlarged each of the pictures so that they would take up the space on each side of the box and I also colored them and then finally laminated them. I taped each picture to a side of the box and then I was ready to practice my storytelling.
You definitely want to spend time practicing your story because of the size of the box. You also need to become comfortable at remembering where each picture is in your story. But the effort and time you put into it will be well worth it. All my kids LOVED it! It was a big success and most of all, this idea kept their full attention. I even asked them some review questions afterwards and they got them all correct.
Practical production tips for your pictures: aim for bold, simple artwork—large faces and clear actions read best for 4–7-year-olds. If your printable is 8.5″×11″, tile two pages across and two down to cover a single side of a 20″ box, or ask your local print shop to enlarge each scene to poster size. For best results set images to at least 150–200 DPI before enlarging. Laminate or cover with clear contact paper to protect the pictures; use strong, wide packing tape (inside and out) to secure edges so little hands can’t peel them off.
Simple storyteller script (one or two short sentences per scene) — use this pattern to tell the story and invite participation:
– Scene 1: “Shadrach, Meshach and Abednego loved God; they chose to obey Him.” (Ask: “Who obeys God?” — children point.)
– Scene 2: “They refused to worship the golden statue.” (Ask: “What did they refuse to do?”)
– Scene 3: “The king was angry and threw them in the fiery furnace.” (Quick, dramatic pause.)
– Scene 4: “God protected them; someone else was in the fire with them!” (Children look surprised.)
– Scene 5: “The fire did not hurt them; they walked out safely.” (Invite clap or cheer.)
– Scene 6: “The king praised God and the three were safe.” (Ask: “How does God help us?”)
Age‑friendly interaction ideas: ask short, obvious questions after each scene (“Who is in the picture?” “Where are they?”), invite children to point to the scene on the box, or call out a repeating phrase with you. For quieter groups, let children come up and touch the picture after you tell that part. These quick responses reinforce the story and make review questions easier.
Sample review questions for ages 4–7 (use call-and-response): “Who was in the furnace?” “Did God help them?” “What did they choose to do?” Add one feelings question: “How do you feel knowing God helps us?” These brief recall questions help you check comprehension and reinforce the memory point.
Telling tips: use a lively voice, slow down for key moments, and point to each scene as you speak. Rotate the box slowly so every child can see the picture you’re describing; keep each scene telling to about 20–30 seconds for this age group. If glare from lamination causes trouble, angle the box or lower overhead lights.
Finally, practice aloud several times so you know which picture comes next—this will keep your pace steady and make the telling feel natural. With that prep and simple interaction, the Big Bible Box becomes an effective storytelling tool that helps children remember the story and the point you want to teach.
Store your box in a safe place and think about other stories you can tell with it. Short, familiar bible stories that break naturally into six scenes work best—examples include Noah, David and Goliath, Jonah, or the Lost Sheep. Label the box with the story name and cover it with a plastic bag or keep it upright on a shelf so it’s ready for the next class or devotion time.
Make a mini series: create 4–6 boxes or swap boxes with other teachers so children experience a new story each week. If you try this idea, share a photo in your classroom group or email it to your children’s ministry—others will love the inspiration. Start small, keep each scene simple for 4–7-year-olds, and enjoy this fun way to help children remember the point of each bible story. Trust me—your kids won’t call you square!
If this Bible storytelling idea helped you teach a memorable Bible truth, join thousands of teachers and leaders who have used The Scripture Lady’s resources to make learning Scripture fun. Subscribe to The Scripture Lady’s Free Newsletter to receive 6 FREE downloadable resources for your classroom or home.
- What you’ll get: 6 printable resources including Bible games and Bible verse songs for both the preschool and elementary levels, all meant to help learn scripture.
- Who it helps: Perfect for Sunday school teachers, children’s ministry leaders, and parents who want creative ways to teach the Bible to kids.
- Privacy note: We respect your inbox — no spam, and you can unsubscribe anytime. Resources are delivered by email.
Click here to subscribe and download your free resources. Thank you!
“Trust in the Lord with all of your heart and lean not on your own understanding. In all of your ways acknowledge Him and He will direct your paths.”
Proverbs 3:5-6


With some prep and simple interaction, the Big Bible Box becomes an effective storytelling tool that helps children remember the story and the point you want to teach.